
Here’s how you can slow down 60fps video recorded using your iPhone and iPad to 30fps right on your iPhone, iPad, and Mac.
Get that Cinematic Look by Slowing Down 60fps Video to 30fps Using Your iPhone, iPad, and Mac
The other day I was having a conversation with a friend, and he was telling me how he uses Final Cut Pro to slow down 60fps video to 30fps for a cinematic look and feel.
In today’s tutorial, I’ll show you how to do that, but without Final Cut Pro. Instead, we’ll use the Photos app in iOS 26, iPadOS 26, and macOS 26.
However, do keep one thing in mind: this tutorial is applicable to 60fps video that was recorded using an iPhone or iPad.
Slow Down 60fps Video Using the Mac
Step 1. Launch the Photos app.
Step 2. Find the 60fps video you want to slow down to 30fps and open it.
Step 3. Now click on the Edit button on the top right.
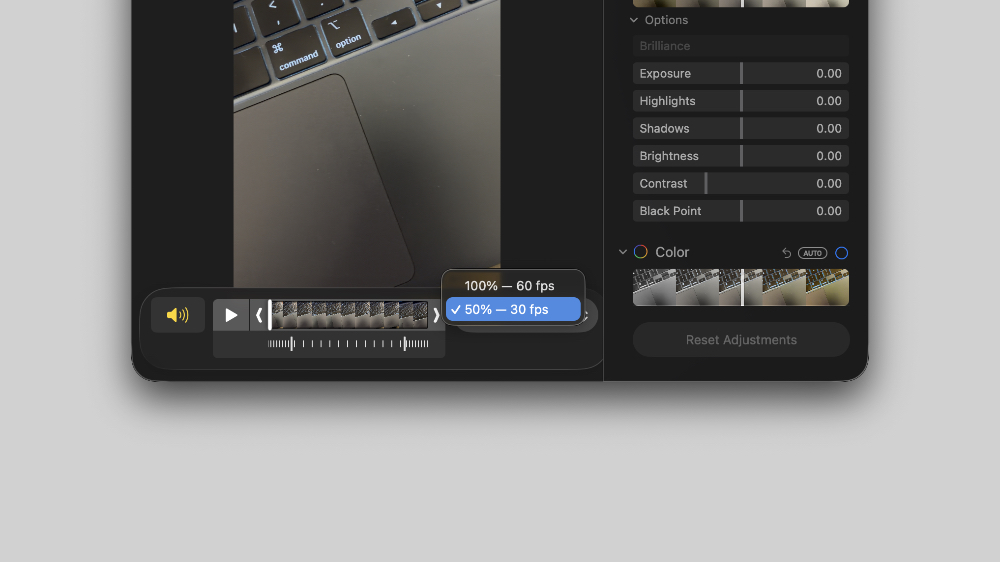
Step 4. Right at the bottom, you’ll see a drop-down menu box for selecting whether you want the video to play at 100% speed or 50%. Select 50%, and once you do that, you’ll see a new slider that allows you to adjust which portion of the video slows down. Use the slider wisely to create the ultimate cinematic effect.
Slow Down 60fps Video Using iPhone and iPad
Step 1. Launch the Photos app.
Step 2. Find the 60fps video you want to slow down.
Step 3. Open the video and then tap on the Edit button at the bottom.
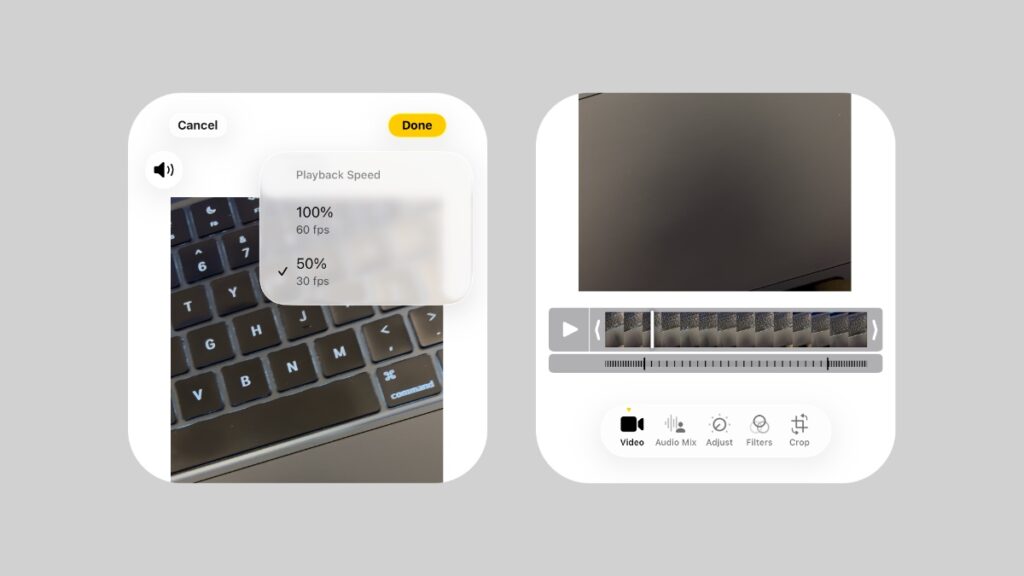
Step 4. At the top right you’ll see an icon that looks like a speedometer. Tap on it to reveal Playback Speed options – 50% and 100%. Now simply select 50%, and a new slider will let you decide which part of the video will slow down, just like the Mac.
See how easy that was? No need to download Final Cut Pro or any third-party app just to slow down a video clip. All the magic happens straight from the Photos app, right on your device, which means anyone and everyone can be a videographer for the day.