
Your Mac allows you to use your iPhone as a microphone instead of the built-in one when you make a FaceTime call.
Your Mac Lets You Use Your iPhone as a Microphone for FaceTime Calls, Here’s How to Set it Up
By default, your Mac will use the built-in camera and microphone for a FaceTime call. But, if you want to sound more clear, then you do have the option to use your iPhone’s microphone instead.
Since it works wirelessly, therefore it looks like pure magic.
It actually makes sense why this feature actually exists, because the Mac mini does not have a built-in microphone. So, using your iPhone’s makes sense here.
Thankfully, you can use this feature on any Mac you may have, including the iMac, MacBook Pro, MacBook Air, Mac Studio, Mac mini, you name it.
Step 1. Make sure your iPhone and Mac are using the same Wi-Fi network and Bluetooth is turned on.
On your Mac: System Settings > Wi-Fi, and System Settings > Bluetooth.
On your iPhone: Settings > Wi-Fi, and Settings > Bluetooth.
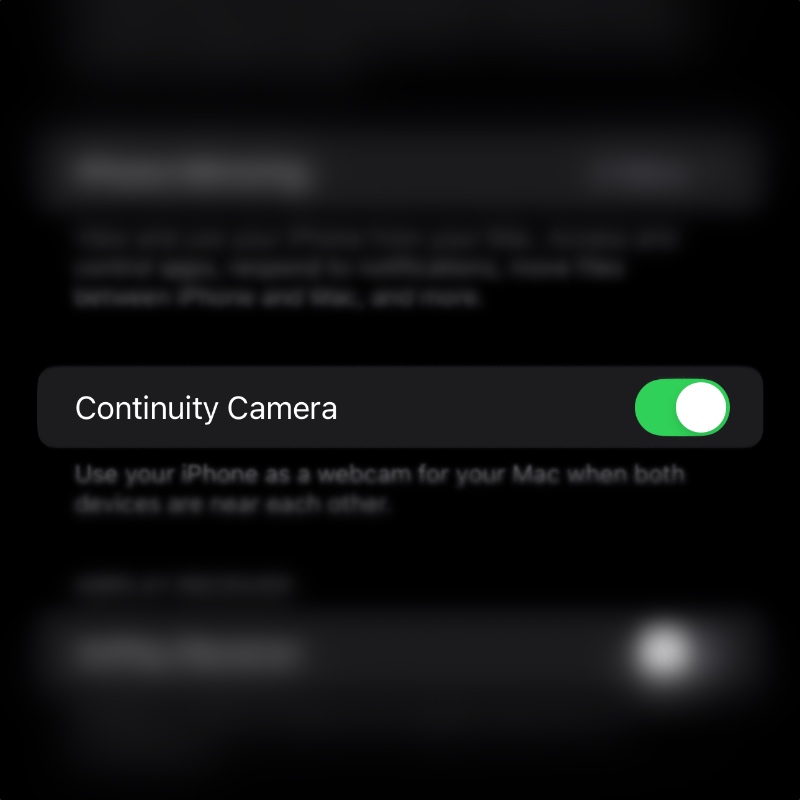
Step 2. Make sure Continuity Camera is enabled on your iPhone. Just go to Settings > General > AirPlay & Continuity, and enable the Continuity Camera toggle switch.
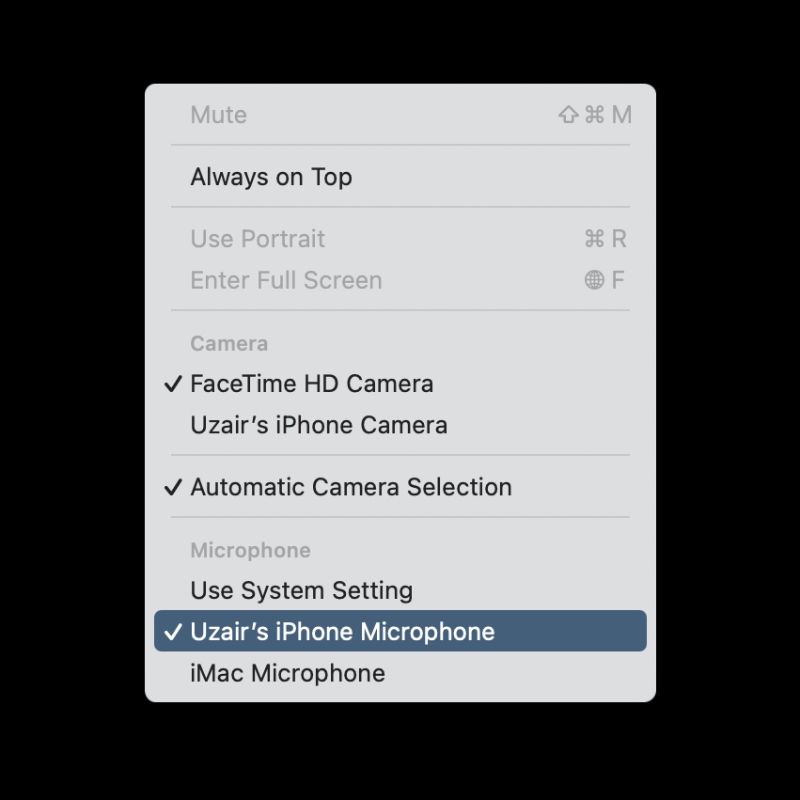
Step 3. Now, launch the FaceTime app on your Mac.
Step 4. In the menu bar, click on Video.
Step 4. From the list of available options, select your iPhone as the microphone.
That’s it, you’re done. Make that FaceTime audio or video call, hold up your iPhone like a microphone, and start talking. It’s simple as that.
As you can see in the above screenshot, you also have the option to use your iPhone’s camera for FaceTime as well. Again, a great feature to have if you have something like a Mac mini that doesn’t have a built-in camera and microphone.